Hello fellow bloggers. Firstly I want to wish you all a happy peaceful joyous and healthy 2012.
The mini that I've got for you today is one which I made with pictures I took in the park of my grandchildren and also of the leaves and trees. I think autumn is my favourite time of year. All the leaves changing colours and crunching through them on the ground is just really enjoyable.
I made this mini in the shape of a leaf. I googled a leaf shape, cut it in half and bound it in the middle with my BIA. The book came out really fat and I should have probably used bigger wires. I'll be cleverer next time. There are lots of pictures here, and I did try to make a video, but I decided that videoing is just not for me, so I hope you'll be patient and look at all my pics. I used mostly the Forever Fall collection from Bo Bunny, but also pulled out everything I own in order to decorate this album. The state of my craft room is a sight to behold.

On the inside front cover I have a journalling tag. The sunflower and leaf are rub ons (or offs) rubbed onto acetate and then cut out. I punched holes in them and hung the from a Tim Holtz hanging thingy
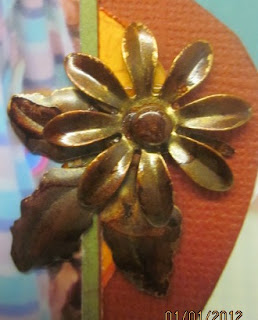
Here is a tree in glorious full colour. The metal embellishments are ages old and I have absolutely no idea where or whence they are from
Here are my two adorable GDDs crunching in the leaves. I alcohol inked some Tim Holtz foliage and used some more rub ons on acetate. There is a close up below.
Here are some examples of the amazing changes the leaves go through at this time of year. The blooms are Prima e-line which I distress inked and then added some bling.
I wanted to get more than one photo onto these pages, so these mattes open up to reveal more picture space. I used some forever fall buttons and created a trail with some inked bakers twine.
This shows how the matte opens up. The green ribbon at the top is done by gathering it and then folding it over as I stuck it down. The dragonfly is cut out from one of the patterned papers and then I added some perfect pearls to the surface. The effect is beautiful and looks gorgeous in real life. The picture doesn't really do it justice.
On these pages I created some pockets into which I put tag shaped mats with my pictures on them. The little mattes on the pockets are from the Forever Fall diecut paper. At the bottom of the pockets I added some Tim Holtz chains, facets and muse tokens all of which got the alcohol ink treatment. A very easy way to ink the facets is to mix your choice of colours in a plastic bag and then dunk them in. Just make sure you don't have a cut finger when you fish them out because it stings like crazy. You might have noticed by now that I am a HUGE fan of Sir Timmy. I love his stuff
This page is a mixture of leaves and grandchildren. Again I wanted to add more than one picture, so I made a lift up matte. Close ups are shown below
My little granddaughter had a wonderful time in the park and was climbing everywhere looking for buried treasure. She got deliciously dirty and muddy and I was quite glad to hand her back to her mother in time for her bath.
The sunflower is another rub on/off onto acetate and adhered with foam squares to give it some dimension
Here are my little angels sitting in ''their'' house. Some fibres, buttons and blooms decorate this page
This page shows my older GDD who would never dream of crawling in the mud. I used som Tim Holtz adage tickets which I distress inked. I alcohol inked a bottle cap and then adhered a muse token which I used perfect pearls on again. I'd never tried perfect pearls on metal and the effect is stunning.
Here's little miss mischief again. You can see what a great time she's having. The leaves are done using stamps on patterned paper and then cutting around them. These were also adhered with foam squares for dimension.
This is a simple page with some ribbon and trinkets added for embellishment. The left hand side is a pocket in which there is another picture. I used a trinket as a pull tab for the tag as seen below
The last page shows some more autumn splendour. The fibres are glued down with glossy accents in a twirly shape
And last but not least here is a little picture of how I added some bling, ribbons and fibres to the binding of my book.
I do hope you enjoyed looking at my mini and I am in the middle of working out a pattern and instructions for this. I hope to put them up on here later in the week. In the meantime thank you so much for taking the time to come here and read my blog


Fab mini book, with great photos. I've got a selection of photos that would suit this style of book so will keep an eye out for instructions.
ReplyDeleteI love that sunflower, it's a great book :)
ReplyDeleteWow, what a gorgeous minibook. I love making minibooks so will look forward to your instructions. Happy New Year!
ReplyDeleteWonderful mini book! Happy New Year!
ReplyDeleteReally gorgeous mini book, lovely earthy colours too.
ReplyDeletec xx
Ooo beautiful love the colours and photos and the shape....must have a go at another mini :)
ReplyDeleteSimply stunning mini book - love the colours and all the embellishments. Happy New Year
ReplyDelete