Hello fellow bloggers. We had our family Chanukah party tonight and the kids and grandkids excelled themselves in the mess making department. I've just finished cleaning up and have finally sat down with the last of the wine.
All the presents were much appreciated except the one we got for DS3. Nothing's ever good for him. There's always something wrong with what we get him. Still he's the youngest so he's a right brat and there's plenty of the green eyed monster in him where the grandchildren are concerned.
Anyway back to the presents. I couldn't find the perfect wrapping for the ponchos I knitted so in true crazy fashion I made the box and wribbon myself. There's a little tutorial on how I made the ribbon and flower for the box and you can see it below.
1. Firstly, I took a wider ribbon and a slightly narrower one in my chosen colours.
2. Adhere the narrower ribbon onto the wider one using your preferred adhesive. I used regular flue stick.
3. Cut 6 lengths of ribbon, 2 each of 3 different lengths. Mine are 9 inches, 7 inches and 5 inches.
4. Fashion your lengths of ribbon into loops with your adhesive.
5. Take the 2 largest loops and and cross one over the other in a plus sign. Adhere at the centre. It's a good to add a dot of glue to the inside centre of your loops to hold them together like a bow iykwim.
6. Take your next size of loops and cross them over in a plus sign again in between the first crossover of ribbon. Adhere at the centre.
7. Take one of your smallest loops and lay it directly over the first loop of ribbon. Adhere at the centre.
8. Cut a small piece of leftover ribbon, about 2 1/2 inches.
9. Tie it round your last loop to form a bow.
10. Finally cross your bow over your first small loop and adhere at the centre. Your flower is now finished
This is the box I made. I used a large piece of cardboard which I stamped with My Mind's Eye Lost and Found stamp.
I used my ribbon to tie the parcel..........
..... and laid my flower on top
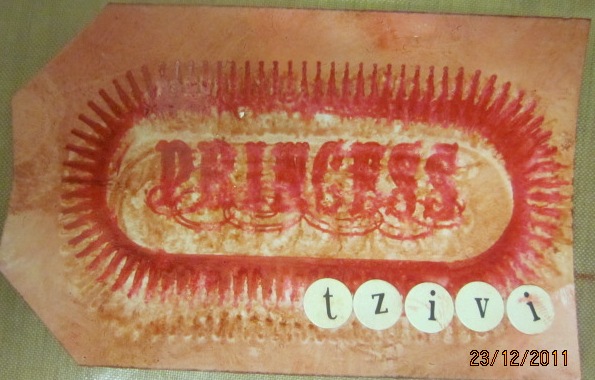
I fashioned a little tag with distress ink and another stamp
And the present is already to hand over. My DD loved the ponchos, and Tzivi paraded around in hers all evening. They look adorable in them and I can't wait to take lots of lovely pics to scrap.
DD2 was born on Chanukah so we had a birthday to celebrate too. She's a crafter too so I bought her crafty stuff both for her birthday and for Chanukah. he was suitably chuffed and also loved her birthday card
I used pink cardstock which I inked, and some acetate which I alcohol inked and inserted into the aperture which I cut out. I stamped the flowers and finished them with liquid pearls. The sentiment are My Little Shoebox mini alphas. Thanks for stopping by and see you again soon
Sunday, 25 December 2011
Monday, 19 December 2011
A New LO
The layout which I've got for you today is one where DGD2 aka Estie is lighting Sabbath candles. All Jewish married women light candles on Friday night and some (big) girls do too. Estie decided the time had come for her to take up the tradition and of course DD snapped this pic.
I used the scrummy Lost and Found collection from My Mind's Eye. I layered a couple of pps one over the other and used a Martha Stewart Punch Around the Page punch to create a photo mat for the picture, I cut strips of PPand edge punched them. I then used foam squares to attach the strips to give them some dimension above and below the photo mat. At the bottom I also added some ribbon to the lower punched strip. I adhered some mini pearls to the pink strips both above and below the photo mat. The photo is also attached with foam squares to raise it off the mat and below the photo is some bronze lace. The word Princess is cut out from one of the pps. I added a combination of purchased and handmade flowers to the left hand side of the LO and a ribbon bow at the top and bottom of the flowers. On the top left corner is a crochet doily and some little banners attached with baker's twine, the end of which I left trailing. Two metal corners on the photo mat and a brown thickers title finish the layout. Below you can see some close ups.
The Princess cut out from one of the pps
The doily, banner, a bow and one of the metal embellies
The punched strips with the little pearls on
I used the scrummy Lost and Found collection from My Mind's Eye. I layered a couple of pps one over the other and used a Martha Stewart Punch Around the Page punch to create a photo mat for the picture, I cut strips of PPand edge punched them. I then used foam squares to attach the strips to give them some dimension above and below the photo mat. At the bottom I also added some ribbon to the lower punched strip. I adhered some mini pearls to the pink strips both above and below the photo mat. The photo is also attached with foam squares to raise it off the mat and below the photo is some bronze lace. The word Princess is cut out from one of the pps. I added a combination of purchased and handmade flowers to the left hand side of the LO and a ribbon bow at the top and bottom of the flowers. On the top left corner is a crochet doily and some little banners attached with baker's twine, the end of which I left trailing. Two metal corners on the photo mat and a brown thickers title finish the layout. Below you can see some close ups.
The flowers Are made using the Spellbinders rose creations dies and the cuttlebug chrysanthemum quilling die
The Princess cut out from one of the pps
The doily, banner, a bow and one of the metal embellies
The punched strips with the little pearls on
Sunday, 18 December 2011
Some Christmas Cards and Teachers Gifts
Hi everyone.
Although I don't actually celebrate Christmas, I have some friends who do, so I made 3 cards to give them. I used the Bo Bunny, Winter Joy range of pps for and embellishments these.
I made them very simple. i more or less just cut the pps, layered them, stuck some embellishments and ribbon on and finished with sentiments. I hope the recipients enjoy them.
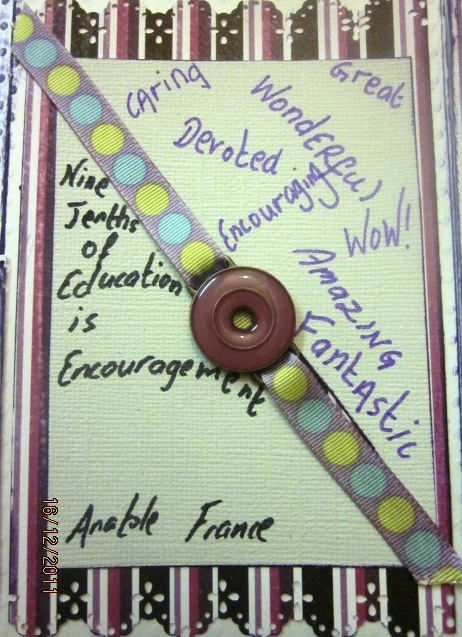
End of term also means gifts for teachers. I don't know why I can't just be like normal people and go out and buy something,but I suppose it's the show off in me. I made an accordian type card and filled it with teacher quotes

The pps are an old Glitz design range, and the rest of the embellies are all dug out from old stash. The front and back covers are chipboard covered in paper and the accordian part is bazzil. I inked the tag with distress ink, stamped it and the used some perfect pearls on it to jazz it up. Some bling finished that off. The quotes are all courtesy of google and the rosettes on the cover are Tim Holtz's mini rossette die. I punched some of the pps with a Martha Stewart edge punch and printed a thank you note on the back to make it personal. Hope you like it and if I don't come on any more till then, Merry Christmas everybody or Happy Chanukah
Although I don't actually celebrate Christmas, I have some friends who do, so I made 3 cards to give them. I used the Bo Bunny, Winter Joy range of pps for and embellishments these.
I made them very simple. i more or less just cut the pps, layered them, stuck some embellishments and ribbon on and finished with sentiments. I hope the recipients enjoy them.
End of term also means gifts for teachers. I don't know why I can't just be like normal people and go out and buy something,but I suppose it's the show off in me. I made an accordian type card and filled it with teacher quotes
The pps are an old Glitz design range, and the rest of the embellies are all dug out from old stash. The front and back covers are chipboard covered in paper and the accordian part is bazzil. I inked the tag with distress ink, stamped it and the used some perfect pearls on it to jazz it up. Some bling finished that off. The quotes are all courtesy of google and the rosettes on the cover are Tim Holtz's mini rossette die. I punched some of the pps with a Martha Stewart edge punch and printed a thank you note on the back to make it personal. Hope you like it and if I don't come on any more till then, Merry Christmas everybody or Happy Chanukah
Monday, 5 December 2011
A Poncho and a New LO
Hello fellow bloggers. I know it's been over a week since I last blogged, but I've been frantically knitting little ponchos for my grandddaughters for Chanukah. My DD really wants them for her kids, but unlike me she's not prone to spending money on what she considers unnecessary fripperies. So crazy woman that I am, instead of going into a shop and buying ponchos which would seem the sensible thing to do, I purchase the raw materials and make them a design of my own. But you lot tell me if it wasn't worth it! I can't wait to see DD's face when I give them to her. And here's a picture to prove how super cute they are. The fringes took me longer to thread than the whole poncho took me to knit
In between all the crazy knitting I managed to complete a LO which I've been want to do since I took these pictures last summer- 2010 so maybe that's summer before last. Anyway it's Sarah blowing bubbles and I just love that look of concentration on her face.
For this LO I used a base of very pale grey bazzil, some sequin waste and lots of spray ink and glimmer mist. The pp at the side is from the Bo Bunny Peacock lane range as are the lollipop flowers and part of the title. I cut that branch out of the paper with my craft knife. Don;t ask what posessed me, I just though it'd be a good idea. I inked and distressed the edges of the flower circle, layered them and put some purple bling on the middle of each one. I hand drew those letters myself. I'd like to show that to my art teacher now, so there! The lilac and white gromlets curving round the photo are ancient and as I was poking around for some embellies I thought these would fit the bill perfectly and make a dent in my mountain of stash. I scratched the surface of them with my tim holtz scratchy thingy and then inked them with white and purple ink. The rest of the title is AC white thickers painted purple as I didn't have any alphas in purple which I deemed suitable for the project. Thanks for popping along to my blog
Sunday, 27 November 2011
An Art Journal Page
Okay so I've braved the world of art journalling. I've always wanted to try it, but art journalling is something completely out of my comfort zone. I don't like not being in control and not being entirely sure what the end result is going to be. When I scrap a layout I don't stick anything down until all the elements are in position and I know exactly what the finished page is going to look like. I then carefully lift up corners of my work and stick them down so as not to move them. I have recently journalled straight onto layouts in preparation for my entry into the big wide world of messiness and I was very pleased with the result
So here is my first ever Art Journal page. I'm not really sure what I did, but I can tell you that I used Dylusions acrylic paints and sparay inks, loads of kitchen roll and a fair amount of gesso. I also made use of some buuble wrap which I had lying around from one of my many virtual shopping expeditions. The rings were made with the lid of a stick of glue and the feather is cut out of a magazine and painted over. I used some Tim Holtz stamps and hand wrote I'm taking flight. Thanks for coming over to look and I'd appreciate any comments especially the nice ones
Thursday, 24 November 2011
A Birthday and a LO
Hi everyone. Today was my hebrew birthday and I must say I had a really good one. First I got some lovely letters from my DGDs written with some help from my sticker box (when I wasn't looking) and their mum. DD 1 made me a fabulous hand painted card and it was lovely getting post that wasn't bills. My sister in law took me out to lunch and made sure I had all my favourites. But best of all, DD2 and her husband wrote a beautiful song especially for me. DD's husband is in music production so the song is really professional. It's a really personal song so I won't share it here, but I will tell you that it brought tears to my eyes and I've been listening to it all day and I've also set it as my ringtone.
Now I also have a LO to share with you. I've had this picture of Tzivi lying around for a while and while I was digging at old pp's I found the perfect one to scrap it with.
Tzivi insists on using this huge umbrella whatever the weather. DD gets really embarrassed but I told her she'll get her revenge when her kids are teenagers.
The diecut pp is a very old Websters Pages. I have no idea which collection it comes from, but it suited the photo perfectly. I used a base of pale yellow cardstock and some blue Best Creations glitter cardstock. I cut the diecut at the border of the floral pattern and plainer side, punched some holes with my crop a dile and threaded red ribbon through the holes. The photo went under the umbrella which I cut out with my craft knife. I added a strip of blue glitter paper and some blooms to the left hand side. The title and journalling are from a rhyme my children used to sing. I don't know where it comes from, but it was a perfect fit so I had to use it. Below you can see close ups of the ribbon and the rhyme. I also doodled in blue and red pen around the outside edges of the LO and around some of the scallops of the die cut
The ribbon that I threaded between the two cut pieces of paper
This is the rhyme that continues on from the title. I used handwriting and some tiny sticker alphas to add interest.
Thanks for visiting
Now I also have a LO to share with you. I've had this picture of Tzivi lying around for a while and while I was digging at old pp's I found the perfect one to scrap it with.
Tzivi insists on using this huge umbrella whatever the weather. DD gets really embarrassed but I told her she'll get her revenge when her kids are teenagers.
The diecut pp is a very old Websters Pages. I have no idea which collection it comes from, but it suited the photo perfectly. I used a base of pale yellow cardstock and some blue Best Creations glitter cardstock. I cut the diecut at the border of the floral pattern and plainer side, punched some holes with my crop a dile and threaded red ribbon through the holes. The photo went under the umbrella which I cut out with my craft knife. I added a strip of blue glitter paper and some blooms to the left hand side. The title and journalling are from a rhyme my children used to sing. I don't know where it comes from, but it was a perfect fit so I had to use it. Below you can see close ups of the ribbon and the rhyme. I also doodled in blue and red pen around the outside edges of the LO and around some of the scallops of the die cut
The ribbon that I threaded between the two cut pieces of paper
This is the rhyme that continues on from the title. I used handwriting and some tiny sticker alphas to add interest.
Thanks for visiting
Wednesday, 16 November 2011
2 New Layouts
Today I want to share with you two layouts which I did yesterday.
This one is a picture of my second granddaughter Estie. She's a right character and this picture of her with her hair blowing in the wind is one of my favourites. For this LO I used the Vicki B collection from Bo Bunny. My base is pale pink bazzil, I then cut a scalloped half circle from pp. For some reason I can't quite fathom, I decided to sew buttons all around the edges of the pp. I added some dark pink cardstock, a punched strip, and some cut out flowers which I adhered with foam squares to lift them off the page. I also added a lace rosette from the collection. Som rick rack a brad and a little trinket gives focus to the photo. I was also brave enough to doodle straight onto my LO. Aroud the edges of the pp I wrote words describing Estie's character and I also hand wrote and coloured part of the title. I've never been brave enough to do this, but I saw this technique in a book I recently bought and really liked it and I do like the end result, so |I'll probably be doing it again soon.
This one is a LO of my recently broken wrist with pictures of my hand casted up and straight after the cast came off. I wanted to scrap this as I want to remember to be grateful for my hands next time I see a pile of ironing I don't want to do. Also I had this crazy idea involving knitting needles.
In my quest to use up old stuff to make room for more, I have no idea which pp's I used. I just picked them out of my old stash drawer. I cut the pp's in to all sorts of random shapes, inked and distressed the edges and then hand stitched around all the edges of all the pp's. I added some layered stars cut out of one of the pp's and then randomly stamped over the page. On the left hand side I cast on some stitches and on the right hand side I knitted a little patch and then cast off. I stuck the needles down at their heads with a drop of glossy accents and then secured them with some more stitching. Some flower centres on the stars and the title finish off this LO. Thakns for looking
This one is a picture of my second granddaughter Estie. She's a right character and this picture of her with her hair blowing in the wind is one of my favourites. For this LO I used the Vicki B collection from Bo Bunny. My base is pale pink bazzil, I then cut a scalloped half circle from pp. For some reason I can't quite fathom, I decided to sew buttons all around the edges of the pp. I added some dark pink cardstock, a punched strip, and some cut out flowers which I adhered with foam squares to lift them off the page. I also added a lace rosette from the collection. Som rick rack a brad and a little trinket gives focus to the photo. I was also brave enough to doodle straight onto my LO. Aroud the edges of the pp I wrote words describing Estie's character and I also hand wrote and coloured part of the title. I've never been brave enough to do this, but I saw this technique in a book I recently bought and really liked it and I do like the end result, so |I'll probably be doing it again soon.
This one is a LO of my recently broken wrist with pictures of my hand casted up and straight after the cast came off. I wanted to scrap this as I want to remember to be grateful for my hands next time I see a pile of ironing I don't want to do. Also I had this crazy idea involving knitting needles.
In my quest to use up old stuff to make room for more, I have no idea which pp's I used. I just picked them out of my old stash drawer. I cut the pp's in to all sorts of random shapes, inked and distressed the edges and then hand stitched around all the edges of all the pp's. I added some layered stars cut out of one of the pp's and then randomly stamped over the page. On the left hand side I cast on some stitches and on the right hand side I knitted a little patch and then cast off. I stuck the needles down at their heads with a drop of glossy accents and then secured them with some more stitching. Some flower centres on the stars and the title finish off this LO. Thakns for looking
Subscribe to:
Posts (Atom)